Quick answer: Yes — a desktop links to most modern televisions via HDMI for mirror or extended desktop use.
This short guide shows the simple route from desk to lounge. Plug an HDMI cable from graphics output into the TV, pick the matching input with the remote, then adjust Windows Display settings to set resolution and refresh rate.
Use a wireless pad and send audio to the soundbar to improve the couch setup. If the screen supports Miracast, Windows lets you project wirelessly through Settings > System > Display > Connect to a wireless display.
Why try this? A larger screen lifts immersion for cinematic titles and local multiplayer games. This section leads you through checks, cabling, setup and simple tweaks to balance visual fidelity and performance on your system.
Can a gaming PC be used with a TV? Short answer and key benefits
Short answer: yes — most modern systems and televisions share HDMI, so you get video and audio over one cable without extra kit.
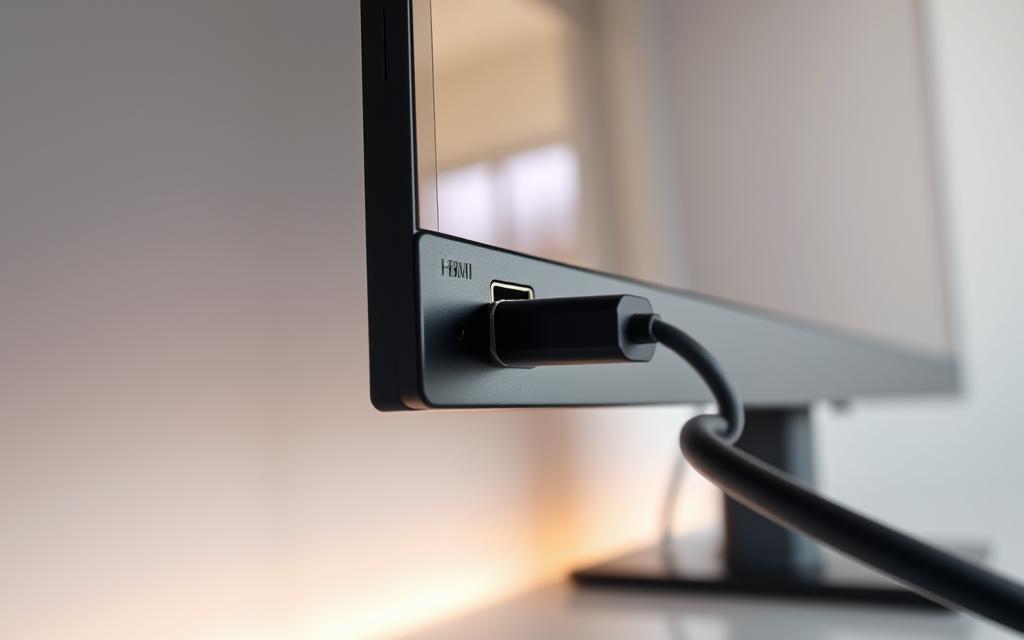
Hooking your desktop to the living‑room display is usually as simple as plugging in an HDMI cable from the GPU’s HDMI output into a spare HDMI input on the screen and switching the TV to that input.
Key benefits:
- Big, cinematic display that enhances story‑driven titles and party play.
- Comfort of sitting on the couch with a wireless controller rather than at the desk.
- Single‑cable simplicity: HDMI carries both picture and audio from output to input.
- Easy setup: in Windows, right‑click the desktop → Display settings to match resolution and refresh rate, and set the TV as the default audio device if needed.
- If onboard speakers fall short, route audio to a soundbar or AVR for better impact.
Wireless projection via Miracast is an option when both devices support it, though wired HDMI usually delivers lower latency and more consistent refresh rates. For detailed steps on turning a large screen into a workspace or lounge display, use your TV as a monitor and follow steps in the later section for a clean, repeatable process.
Check compatibility: ports, standards and TV capabilities
Check physical connectors first — that tells you whether a simple cable will do or an adapter is needed. Confirm the GPU’s available ports and the display’s inputs before buying any extras.
HDMI on PC and TV: the simplest path
HDMI carries video and audio in one cable and is the most universal connection. Select the correct HDMI input on the screen and set matching resolution and refresh rate in Windows to avoid display issues.
DisplayPort and alternatives
If the graphics card uses DisplayPort and the screen lacks that port, use an active DisplayPort‑to‑HDMI adapter to preserve high resolutions and refresh targets. Monitors more often include DisplayPort; many TVs do not.
Audio considerations
For external sound, ensure the chosen HDMI input supports ARC/eARC if you route audio from the screen to a soundbar or AVR. Otherwise, set the PC’s audio output to the correct playback device in Windows sound settings.
Resolution, refresh rate and bandwidth
Match the display’s supported resolution and refresh. HDMI 2.0 typically limits 4K to 60Hz; HDMI 2.1 allows 4K at 120Hz. Verify EDID, enable any “PC” or “Enhanced” input mode, and double‑check cable version before proceeding.
“Confirm ports and standards first; it saves time and prevents needless troubleshooting later.”
| Connector | Typical use | Max common support |
|---|---|---|
| HDMI 2.0 | Single‑cable video + audio | 4K @ 60Hz |
| HDMI 2.1 | High‑bandwidth video + audio | 4K @ 120Hz |
| DisplayPort → HDMI | Adapter for non‑matching ports | Depends on adapter (active recommended) |
For detailed step‑by‑step guidance on how to connect your desktop to the TV, follow this short guide to connect your desktop to a TV.
Get the right cables and adapters before you connect
Preparation saves time. Map the route from system to screen, then pick connectors and lengths that match the display’s capabilities.
Choosing an HDMI cable: length, quality and version for gaming
Use HDMI 2.0 or newer for 4K connections. HDMI 2.0 supports 4K at 60Hz; Ultra High Speed cables and HDMI 2.1 are required for 4K at 120Hz.
Measure the run and avoid tight bends. A cable under tension shortens life and may cause signal dropouts at the end plug.
Adapters you may need: DisplayPort-to-HDMI and USB-C-to-HDMI
If outputs don’t match inputs you may need an adapter. Prefer active DisplayPort‑to‑HDMI converters or USB‑C (DP Alt Mode) adapters to preserve resolution and refresh targets.
Keep a spare certified cable to rule out faults when testing higher refresh or colour modes.
Wireless options: Miracast and wireless HDMI for living room setups
For tidy living rooms, Miracast and wireless HDMI kits are viable, but expect added latency; this matters for competitive gaming.
Windows can connect to Miracast-capable devices via Settings > System > Display > Connect to a wireless display. Plan ARC/eARC runs if using a soundbar or AVR.
- Choose certified cables for the resolution you intend to run.
- Label inputs so switching sources is straightforward.
Follow steps to connect your gaming desktop to the TV
Quick setup makes the switch from desk to lounge painless. Follow steps below to get image and sound working cleanly for couch play.
Power off and plug the HDMI lead
Power down both devices before you touch connectors. This protects ports and helps Windows detect the display on boot.
Connect the HDMI cable from the GPU’s HDMI output into a free HDMI input on the screen. Make sure the plug is fully seated.
Select input and power on
Turn on the television, then the desktop. Use the TV remote to choose the same input where the cable is connected.
If nothing appears, try a different HDMI input or reseat the cable to rule out a loose connection.
Configure Windows display settings and audio
Open Display settings in Windows to choose Duplicate or Extend. Duplicate or single‑display mode is easiest for couch use.
Set the TV’s native resolution and adjust scaling so UI elements remain readable at sofa distance. Use Win+P for a quick mode switch.
In sound settings, select the TV as the default playback output so audio goes through the screen, soundbar or AVR.
Optional: pair a wireless controller
Pair an Xbox Series or DualSense pad via Bluetooth or a wireless dongle. Map controls in‑game and enable Steam controller support if needed.
- Power down devices, plug HDMI from GPU HDMI output to TV HDMI input.
- Power on, select the correct input, verify display on boot.
- Adjust display settings and set TV as audio output.
- Tidy the cable and test controller input before you start the game.
Optimise picture, performance and audio for the big screen
Small tweaks in system and TV settings deliver a big uplift in image quality and responsiveness.
Match resolution and refresh rate to your TV’s capabilities
Open Windows Display settings and select the TV’s native resolution. For most modern sets this means 4K; choose 4K120 only if the GPU and HDMI path support it.
If frame rates fall at 4K, drop to 4K60 or 1440p for higher refresh. Use the display refresh control to match TV modes and avoid unnecessary upscaling.
Tune in‑game graphics, enable DLSS/FSR and adjust V‑Sync
Reduce heavy effects first: shadows, ambient occlusion and ray tracing cost the most frames. Enable DLSS or AMD FSR where available to upscale while keeping quality high.
If tearing appears, try V‑Sync, Fast Sync or enable VRR on both GPU and TV. This synchronises frame delivery and smooths motion during fast scenes in game.
Calibrate the screen: colour, sharpness and game mode on the TV menu
Enable the TV’s Game mode to cut processing latency and turn off motion smoothing. Use the menu to set colour temperature, gamma and sharpness.
Over‑sharp settings create halos on text. If using built‑in speakers, set the TV as the default audio device in Windows or route sound to a soundbar for fuller impact.
“Match output modes, trim costly visual effects and enable low‑latency input options for the best living‑room experience.”
| Focus | Quick action | Benefit |
|---|---|---|
| Resolution & refresh | Set native resolution and highest supported refresh | Clear image and correct motion handling |
| Graphics settings | Lower shadows/RT, enable DLSS/FSR | Higher frame rates, good visual fidelity |
| TV menu | Enable Game mode, disable motion smoothing | Lower input lag |
| Audio | Select TV as default or use soundbar/AVR | Fuller sound for action games |
Troubleshooting common issues and quick fixes
If the screen stays black, verify source selection, reseat the HDMI cable, and try another port on the television or GPU.
No signal or black screen: input, cable and port checks
Quick checks: ensure the display is set to the correct HDMI input. Reseat the HDMI cable and swap it for another known-good cable.
If the problem persists, try a different HDMI port or the GPU HDMI output. Boot with a secondary monitor, then hot‑swap to the larger screen once Windows is running.
Display not fitting the screen: scaling and overscan adjustments
Open display settings in Windows to adjust scaling so desktop elements fit the screen. If edges remain clipped, change the TV menu to PC mode, Just Scan or 1:1 to disable overscan.
Tip: lower scaling in Windows in small steps until text is crisp and UI elements sit fully on the screen.
No audio over HDMI: playback device selection and cable support
Select the television as the default playback device in Windows sound settings. Confirm the HDMI cable supports audio; some adapters lack audio passthrough and may need external routing.
Stuttering or low frame rates: resolution targets and graphics settings
If motion is choppy at 4K, drop resolution to 1440p or 1080p or reduce heavy graphics options. Enable DLSS or FSR where available to regain smooth frame rates for gaming.
Also check for bandwidth limits on the chosen HDMI input; some ports are restricted and will not support high refresh or full HDMI feature sets.
- Intermittent drops: try a certified, shorter HDMI cable or an active adapter rated for the desired resolution and refresh.
- Handshake issues: power‑cycle both devices, turn the TV on first, then the system, and select the input after boot to force EDID refresh.
Conclusion
,To wrap up, connect the HDMI lead to the graphics output and pick the matching input on the display. Power both devices, then set the desktop as needed.
Quick checklist: connect gaming via HDMI, make sure cables match your resolution goals and choose the right input. Open Windows settings to adjust display resolution and audio output.
Fine‑tune game options and enable the TV’s Game mode for lower lag. Pair a wireless controller and enjoy titles from the couch with clean sound routed through your soundbar or AVR.
If issues appear, check inputs, swap cables and review scaling. With these simple steps you’ll turn your desktop into a big‑screen hub for better gaming and fuller‑screen games.
FAQ
How do I connect my desktop’s HDMI output to the TV’s HDMI input?
Power down both devices, plug a high-quality HDMI cable into the GPU’s HDMI output, then into a free HDMI input on the television. Power up, choose the matching HDMI input from the TV’s input/source menu and configure Windows display settings if needed.
Which HDMI version should I pick for 4K at 120Hz?
Use an HDMI 2.1 cable and ports on both the graphics card and TV to achieve 4K at 120Hz with full colour depth and variable refresh features. If either device only supports HDMI 2.0, you’ll be limited to 4K at 60Hz or lower bandwidth options.
What if my graphics card only has DisplayPort and the TV has HDMI?
Use an active DisplayPort-to-HDMI adapter that supports the resolution and refresh rate you want. Passive adapters often won’t pass higher bandwidth or HDR. Confirm the adapter supports HDMI 2.0/2.1 features if you need 4K or high refresh rates.
How do I make sure audio plays through the TV instead of PC speakers?
In Windows, open Sound settings and select the TV (HDMI) as the default playback device. Also check the TV’s audio input settings and ensure the HDMI cable supports audio. Use ARC/eARC for soundbar passthrough if you prefer external speakers.
Why is the picture cropped or overscanned on the TV?
Adjust scaling or overscan in the TV menu (often called “Picture Size”, “Overscan” or “Just Scan”) and set scaling in Windows display settings. Choose the native resolution of the TV for best results and disable any zoom modes on the television.
My PC shows “no signal” on the TV — what should I check?
Verify the HDMI cable and ports, confirm the TV is set to the correct input, and ensure the GPU is selected as the active output in BIOS or Windows. Try another HDMI port, swap cables, and test the TV with another device to isolate the fault.
Can I play games from the sofa with a wireless controller?
Yes. Most Xbox and PlayStation controllers pair with Windows via Bluetooth or USB receiver. Connect the controller in Windows Bluetooth settings or use the wireless dongle for lower latency. Enable controller profiles in Steam or the relevant launcher.
Will wireless HDMI or Miracast match a wired connection for latency?
Wireless options add latency and can cause compression artefacts. Wired HDMI offers the lowest latency and best image quality for fast-paced titles. Use wireless only when running cables is impractical and for casual or turn-based games.
How do I get the best frame-rate and picture quality on the big screen?
Match the TV’s resolution and refresh rate in Windows, lower in-game settings that hit the GPU hardest, and enable upscaling technologies like DLSS or FSR if available. Turn on the TV’s Game Mode to reduce input lag and disable unnecessary post-processing.
Why is there no HDR or 4K option available after connecting?
Check that the HDMI cable, GPU port and TV port all support HDR/4K at the desired bandwidth. Enable HDR in Windows display settings and in the TV’s HDMI input settings (some TVs require the specific port to be labelled HDCP/Enhanced). Update GPU drivers if options remain missing.
Are long HDMI cables okay for living room setups?
Quality matters. For runs under 5 metres use a certified high-speed cable. For longer distances choose fibre HDMI or an active cable to avoid signal degradation. Ensure the cable’s version supports the resolution and refresh rate you need.
How do I handle audio when using a soundbar with ARC/eARC?
Connect the soundbar to the TV’s ARC/eARC HDMI port and enable ARC/eARC in the TV settings. Set the TV to send audio to the soundbar and select the TV’s HDMI output as the PC’s playback device. Check formats supported by ARC/eARC for surround sound.
My game stutters on the TV but runs fine on a monitor — what’s next?
Lower in-game resolution or graphical presets to target your TV’s native resolution, check for V-Sync or variable refresh conflicts, and ensure the TV’s firmware and GPU drivers are up to date. Test different refresh rate settings and confirm the HDMI bandwidth supports the chosen mode.

